Generate Meeting minutes
Documentation of isLucid is made to support you. Any new thing can be confusing. What is natural for us, does not necessary is understandable for everybody else in the world. So we encourage you to ask for help, clarifications and assistance if anything is unclear
On this page, you will find quick walk-through information helping you to generate meeting minutes in the isLucid Application. During this process you will:
- Steps in creating meeting minutes in isLucid

Creating Meeting Minute

After the Call
Once the call is finished, navigate to the isLucid application on the left side of the Microsoft Teams panel.
Note: Every member has to leave before accessing the meeting minutes!

Saved Documents
Tab located on the upper side of the panel
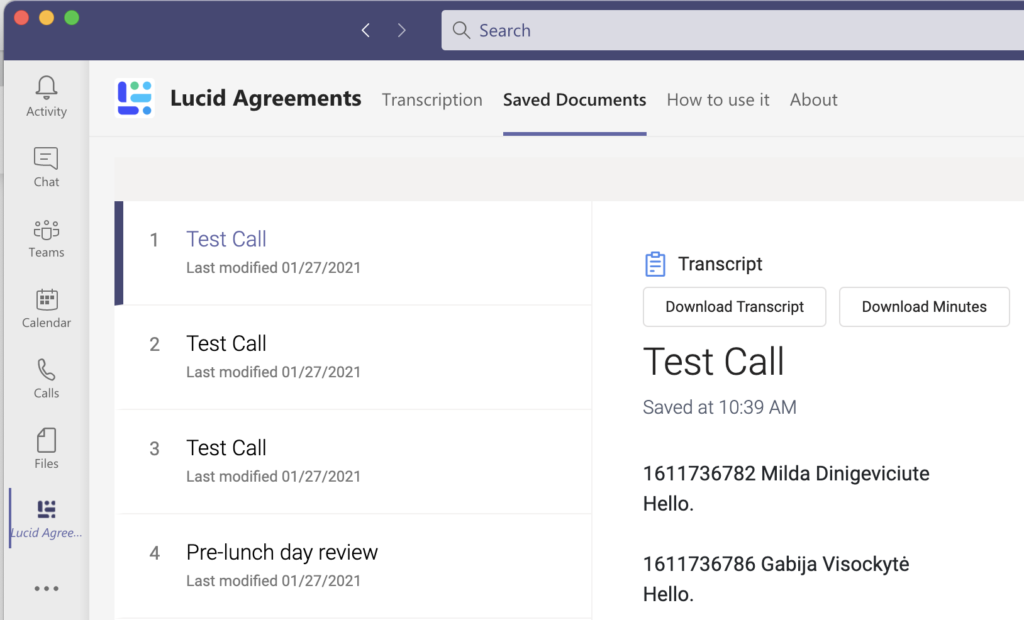
Choose a meeting
For which meeting minutes to be generated, additionally create more actions items if necessary
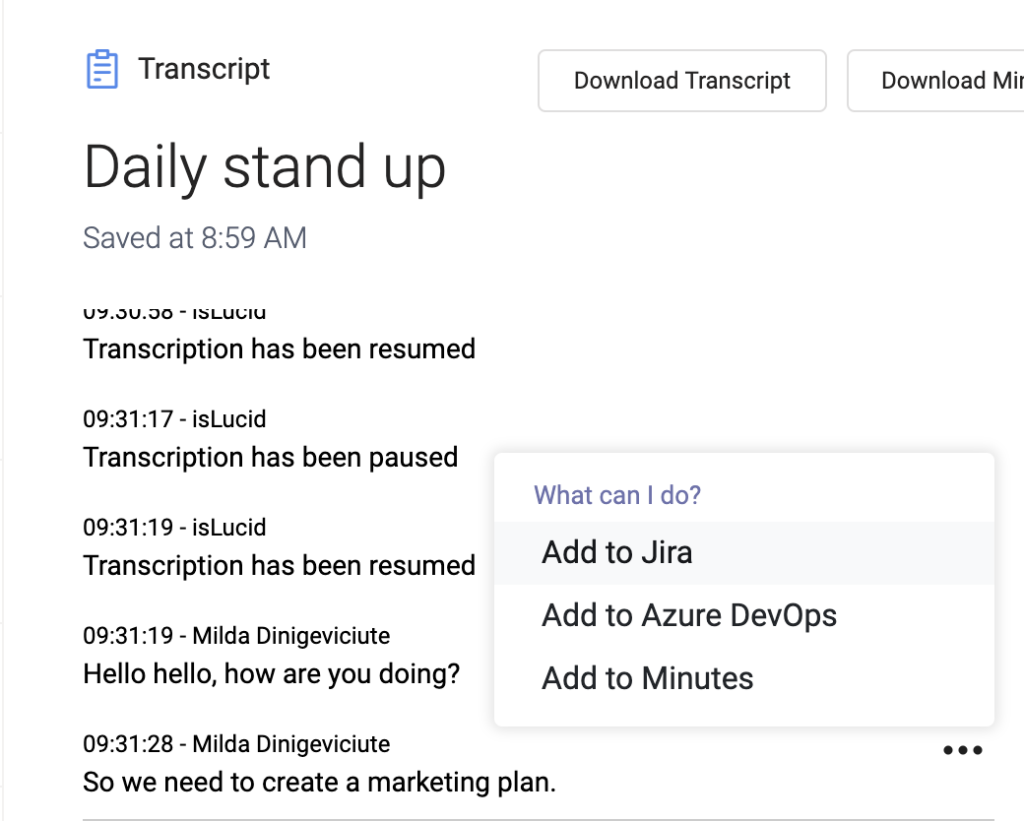
Download Transcript & Meeting minutes
After a brief moment, you can download your documents from the tab on the top right of the application

Additional comment:
Currently, you do not see any notification when downloading meeting minutes. Just go to your “Downloads” folder and it will be in there!

Still have open questions? Ask away!